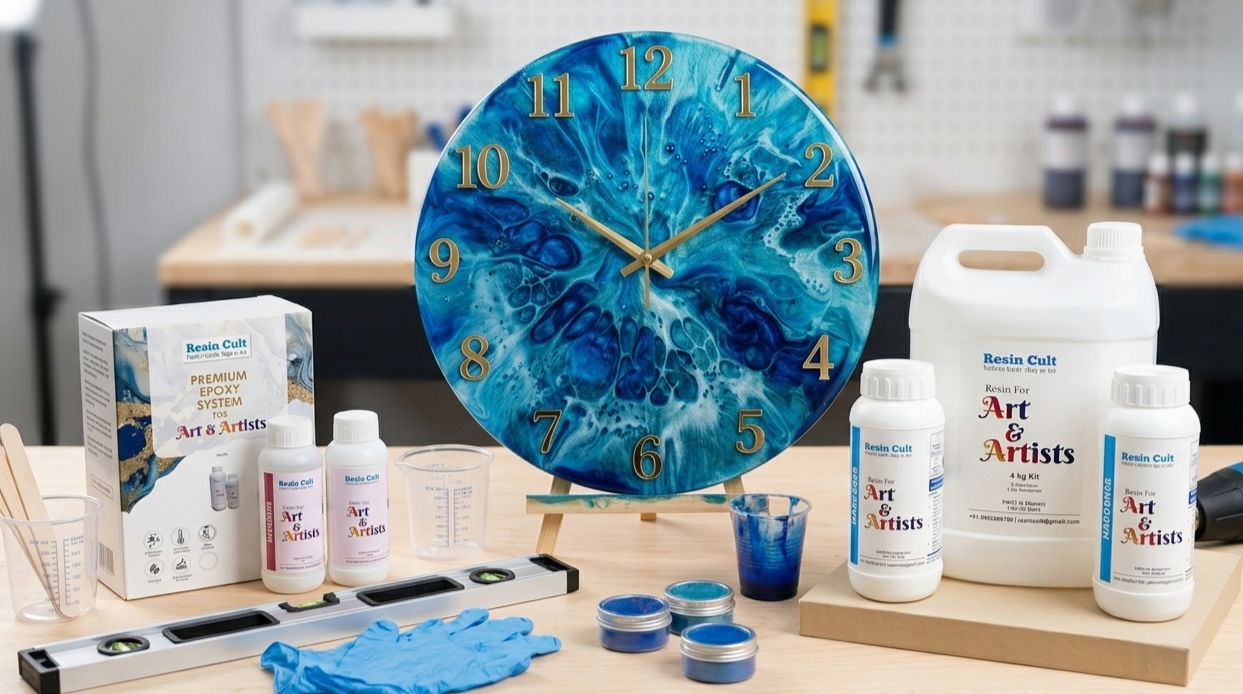
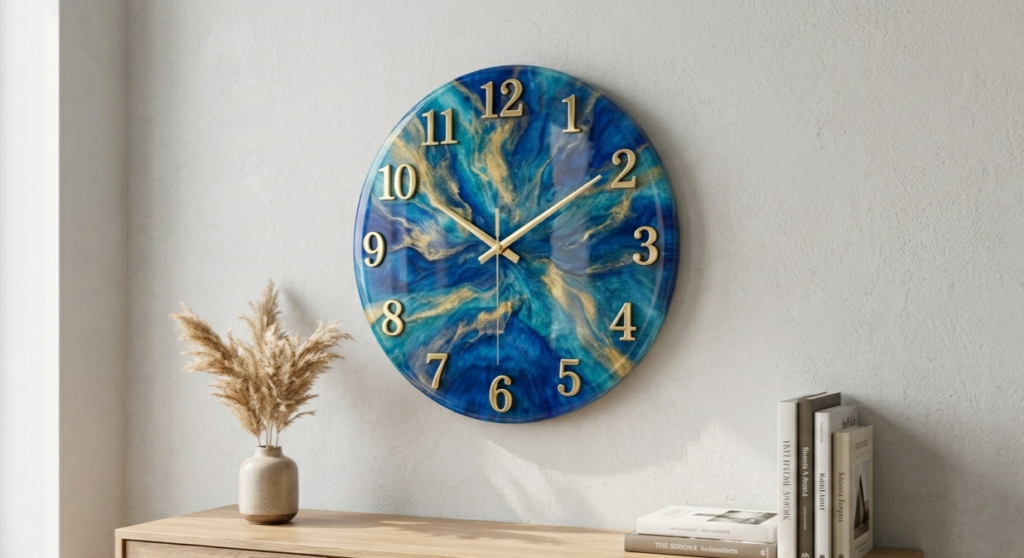
If you’ve been scrolling through Instagram or Pinterest lately, you’ve likely seen the mesmerizing swirl of resin art wall clocks. These functional pieces of art have become a massive trend in India, blending modern home decor with the fluid beauty of epoxy.
The best part? You don’t need to be a professional artist to make one. Whether you want to create a resin wall clock diy project for your living room or start a small creative business, this guide will show you exactly how to do it.
Why Choose an Epoxy Resin Clock?
Standard plastic clocks are a dime a dozen, but a resin clock is a statement piece. Using high-quality epoxy resin clock techniques allows you to:
- Match your interior: Use specific pigments to complement your wall paint.
- Add Depth: Unlike acrylic paint, resin has a 3D, glass-like finish.
- Durability: Once cured, these clocks are rock-hard and easy to clean, perfect for the Indian climate.
Must-Have Materials for Your Resin Clock
To get started, you’ll need a few specific supplies. Most of these are easily available on Amazon India or through local art polymer suppliers.
- Epoxy Resin Kit: Look for a “1:1” or “2:1” ratio kit. For a clock, Artist Resin 2:1 is a fantastic choice because it has a 45-minute working time—plenty of time to design your patterns.
- Resin Clock Mold: A silicone resin clock mold is the secret to a perfect circle. These usually come in 12-inch or 16-inch diameters and have a pre-made hole in the center for the machinery.
- Clock Movement Kit: This includes the motor (the “machine”), the hands (hour, minute, second), and the hanging hook.
- Pigments: Mica powders (for a metallic shimmer) or opaque liquid pigments work best.
- Safety Gear: Nitrile gloves and a well-ventilated room are non-negotiable.
- Tools: A kitchen scale (for precise mixing), disposable cups, wooden stirrers, and a heat gun or a simple gas lighter to pop bubbles.
Step-by-Step: Crafting Your Resin Wall Clock
Step 1: Preparation and Leveling
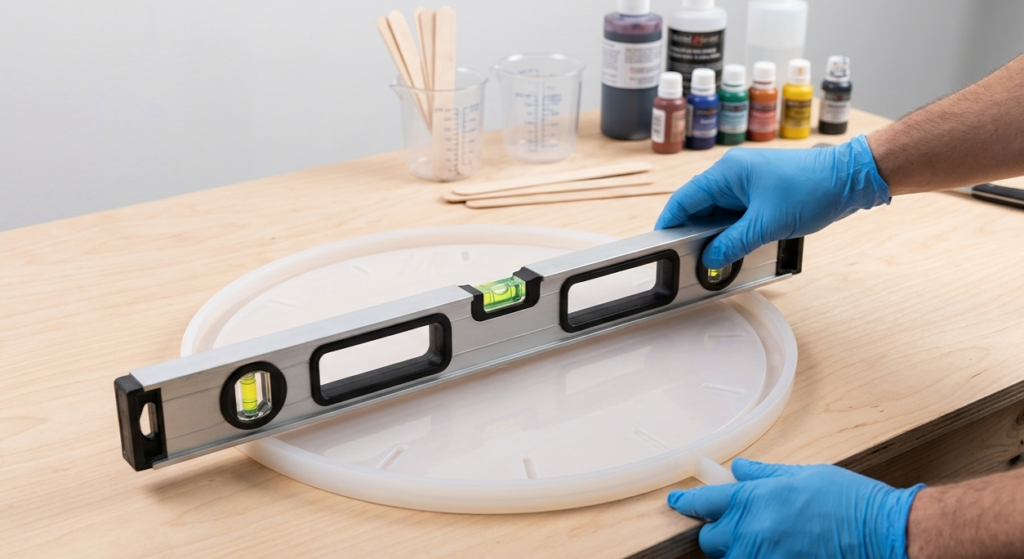
Resin is self-leveling, which means if your table is even slightly tilted, the resin will pool on one side, leaving you with a lopsided clock. Use a spirit level (or a leveling app on your phone) to ensure your workspace is perfectly flat. Place your resin clock mold on the leveled surface.
Step 2: Mixing the Resin
Precision is the difference between a beautiful clock and a sticky mess.
- Measure: If using a 2:1 resin, weigh 100g of Resin (Part A) and 50g of Hardener (Part B).
- Stir: Stir slowly for at least 3 minutes. Scrape the sides and the bottom of the cup to ensure every drop is mixed. If it looks cloudy or has “streaks,” keep stirring until it’s crystal clear.
Step 3: Adding Color
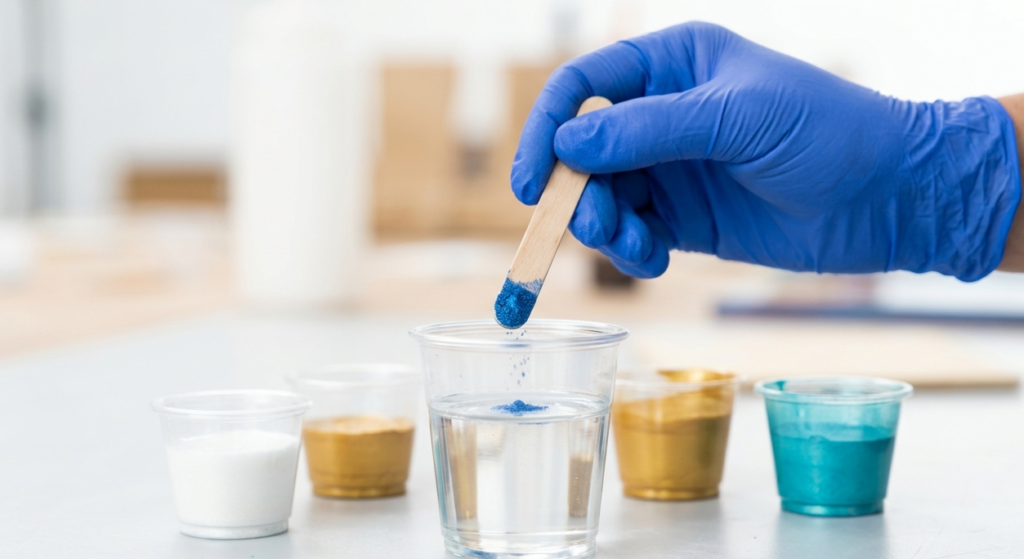
Divide your mixed resin into smaller cups. Add a tiny amount of pigment to each.
- Pro Tip: For resin art wall clocks, less is more. Start with a toothpick’s tip of pigment. You want the colors to be vibrant but not so thick that they don’t flow.
Step 4: The Pour
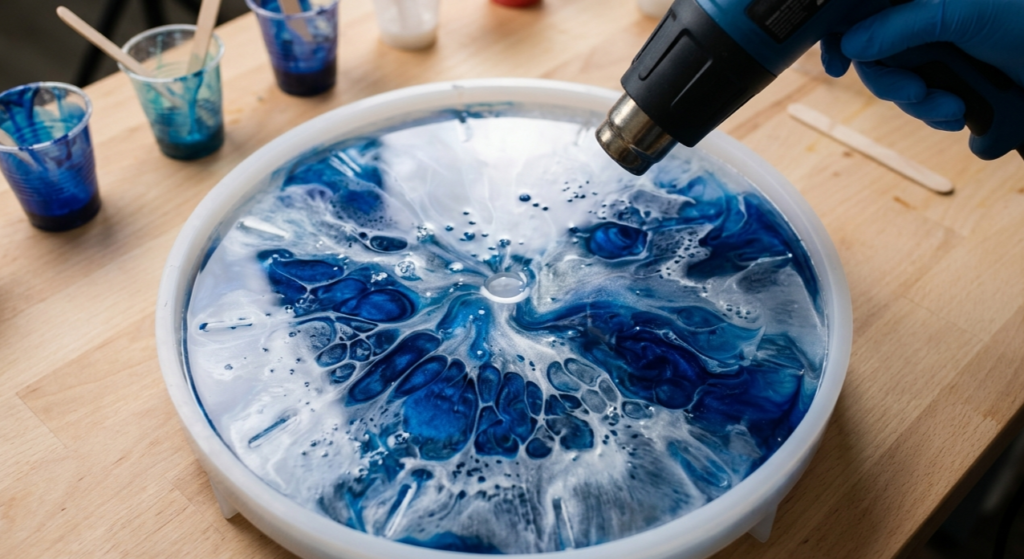
This is where the magic happens. Start pouring your base color from the edges toward the center. Then, pour your secondary colors in “puddles” or “veins.”
- Creating Cells: Use a heat gun to gently push the resin around. This creates “lacing” or “cells” that give resin wall clock designs that professional, organic look.
- Popping Bubbles: After 5 minutes, you’ll see tiny bubbles on the surface. Quickly pass a lighter or heat gun over them to pop them instantly.
Step 5: Adding the Numbers

You have two choices for numbers:
- Embedded: Place acrylic or metal numbers directly into the wet resin.
- Surface: Stick them on after the resin has fully cured.If you are using a resin clock mold with number indentations, you can simply fill those with a contrasting color first!
Step 6: The Curing Process
Cover your work with a large box to prevent dust or hair from landing on the sticky surface.
- Wait Time: Based on Artist Resin 2:1 specs, the resin will be touch-dry (Layer Time) in about 6-8 hours, but you should wait 24 hours before demolding.
- Internal Cure: Even if it feels hard, the resin takes 72 hours to reach its maximum strength. Don’t rush it!
Assembling the Clock Machinery
Once your epoxy resin clock is demolded and fully hard:
- Sand the Edges: If there are sharp “drips” on the back, use a 400-grit sandpaper to smooth them out.
- Insert the Machine: Push the clock shaft through the center hole from the back.
- The Order of Hands: First, slide on the Hour hand, then the Minute hand, and finally the Second hand. Ensure they are all parallel and not touching each other.
- Test: Insert a battery and watch your resin clock come to life!
Quick Troubleshooting for Indian Crafters
- Sticky Surface? This usually happens due to inaccurate mixing or high humidity during the monsoon. Ensure you use a digital scale and work in a dry room.
- Yellowing? To keep your resin art wall clocks looking fresh, use a resin with UV stabilizers, especially if the clock will be near a window.
- Fish Eyes (Holes in the resin): This happens if the mold was oily or dusty. Always wipe your mold with a bit of Isopropyl alcohol before you start.
Summary Table: Choosing Your Resin
| Resin Type | Best For | Working Time | Pour Depth |
| Artist Resin 2:1 | Top Coats & Geode Styles | 45 Mins | 5 mm |
| Geode Resin 2:1 | Fast Curing & Blooms | 40 Mins | 3 mm |
| Flash Resin 3:1 | Quick Projects | 40 Mins | 7 mm |
Creating a resin wall clock diy project is a fantastic way to step into the world of fluid art. It’s a mix of science and soul—once you master the mixing ratio, the creative possibilities are endless. From “Ocean Blue” themes to “Marble White and Gold,” your wall is about to get a major upgrade.